A warning light comes on, the car still drives, and the temptation is to ignore it until something gets worse. That is usually where wasted time and misdiagnosis start. If you want to know how to read OBD2 codes properly, you need more than a scanner that spits out a fault number – you need to understand what the code is actually telling you, and just as importantly, what it is not.
Modern vehicles are full of control modules, sensors and networked systems. OBD2 gives you a way into that data, but the code itself is only the first step. Whether you are a garage technician checking a repeat fault or a capable DIY owner trying to make sense of an engine management light, reading codes correctly saves guesswork, parts swapping and unnecessary downtime.
What OBD2 codes actually are
OBD2 stands for On-Board Diagnostics, second generation. In practical terms, it is the vehicle’s self-monitoring system. When the ECU or another control module sees a value or behaviour outside its expected range, it stores a Diagnostic Trouble Code, often shortened to DTC.
That code is a reference point, not a full diagnosis. A fault code can point you towards a circuit, a component, a system performance issue or a communication problem. It does not automatically mean the named part has failed. That distinction matters. A code for an oxygen sensor, for example, may be caused by wiring damage, an air leak, fuelling issues or the sensor itself.
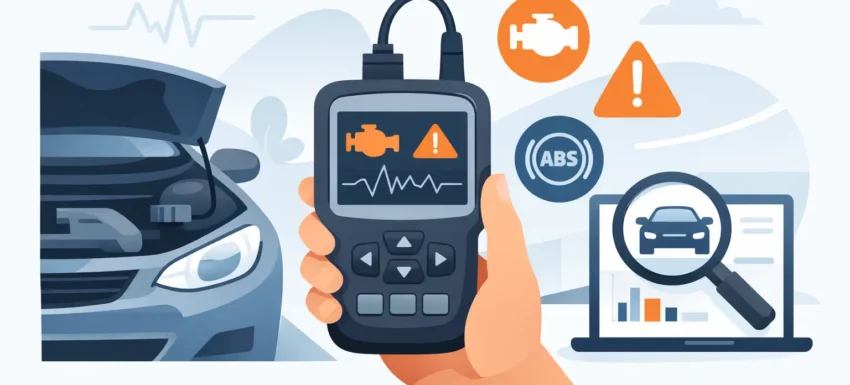
How to read OBD2 codes step by step
The process is straightforward if you use the right sequence. Start by locating the OBD2 port, which is usually under the dashboard on the driver’s side. On some vehicles it may be tucked behind a trim panel or slightly off-centre, but it is normally within easy reach of the steering column area.
Plug in your scanner with the ignition off unless the tool instructions say otherwise. Then switch the ignition on. Some tools want the engine off during initial code reading, while others can read live data with the engine running. Follow the tool prompts rather than guessing.
Once connected, select the correct vehicle if your scanner requires manual input. A basic code reader may jump straight to generic powertrain codes, while a more capable diagnostic tool can identify vehicle systems automatically and access manufacturer-specific modules. That difference matters if you are dealing with ABS, airbag, transmission or body control faults rather than just engine codes.
Run a fault code scan and record everything before clearing anything. This is one of the most common mistakes. People see a code, erase it immediately, and lose freeze frame data that could have shown engine load, coolant temperature, rpm and operating conditions at the point the fault was logged.
How to understand the code format
If you are learning how to read OBD2 codes, the structure of the code tells you a lot straight away. A typical code looks like P0301 or C0035.
The first letter identifies the system. P is powertrain, which covers engine and transmission. B is body, C is chassis, and U is network communication.
The first digit after the letter tells you whether the code is generic or manufacturer-specific. A 0 usually means a generic code used across most makes. A 1 often means manufacturer-specific, so the wording and test path may vary depending on the vehicle.
The remaining digits narrow down the fault category and the individual issue. P0301, for example, points to a cylinder 1 misfire. That is useful, but it still does not tell you whether the cause is ignition, fuelling, compression or wiring.
Generic codes vs manufacturer-specific faults
This is where cheaper tools often hit a limit. Generic OBD2 readers are useful for emissions-related engine faults, and for many users they are enough to identify the broad area of concern. But modern vehicles often store additional manufacturer-specific codes that basic readers cannot see.
If you only pull generic codes, you may miss the details that turn a rough guess into an accurate diagnosis. A workshop dealing with multiple makes, or a DIY owner maintaining newer vehicles, gets far better results from a scanner that supports wider module access and deeper code descriptions.
That is why tool choice matters. The right scanner does not just read a code – it gives you enough system access to act on it properly.
Read the description, then verify the fault
A code description is a starting point. Treat it like a direction sign in the workshop, not the final answer. If the scanner shows a mass air flow circuit issue, look at the connector, wiring integrity, live readings and intake condition before ordering a new sensor.
This is where live data and freeze frame data make the difference. Stored codes tell you what happened. Live data helps you judge whether the issue is present now. Freeze frame helps you understand the conditions when it happened.
Intermittent faults are a good example. You may have a stored code for low boost pressure, but the vehicle behaves normally in the bay. Freeze frame may show the fault only occurs under high load on the road. Without that context, parts can be replaced unnecessarily.
Common mistakes when reading OBD2 codes
The biggest mistake is assuming the code names the failed part. It often does not. A circuit code may be caused by corrosion in a connector. A sensor performance code may be triggered by a vacuum leak. A communication code may be down to low battery voltage rather than a failed module.
Another mistake is clearing codes too early. If you erase them before recording the data, you remove evidence that can speed up diagnosis. Clear only after you have documented the fault and carried out repairs or checks.
There is also the issue of reading only one code in isolation. Faults often come in groups. A single underlying problem, such as voltage instability, can trigger multiple unrelated-looking codes. If you chase them one by one without looking for a common cause, you waste time.
Finally, do not ignore pending codes. These are faults the vehicle has detected but not yet confirmed enough times to switch on the warning lamp permanently. They can be valuable early warnings.
When a code is useful and when it is not enough
Some codes are highly targeted. A cylinder-specific misfire or a heater circuit fault can narrow your checks quickly. Others are broad and need proper follow-up testing. A lean condition code, for instance, could involve fuelling, intake leaks, exhaust leaks, sensor readings or pressure issues.
That is the trade-off with OBD2. It is excellent for fault direction, but not every issue can be solved with code reading alone. Mechanical faults, wiring breaks under load, intermittent network problems and sensor plausibility issues often need multimeter testing, smoke testing, actuator checks or scope work.
For professionals, that is standard practice. For DIY users, it is the point where a better scan tool and a methodical approach make a real difference.
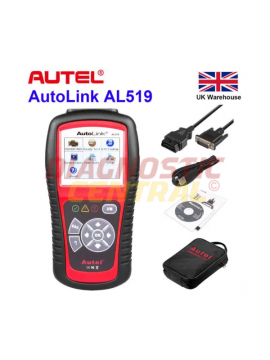
Choosing a scanner that helps you read codes properly
If you only want to check the reason for an engine light on your vehicle, a simple code reader may do the job. If you maintain more than one car, work on different makes, or need access to ABS, SRS, service functions or battery registration, a more capable unit is the better investment. Or if you want a complete kit our kits come fuully installed and ready to use, they also come with 12 months online support.
Good diagnostic equipment should give you clear code definitions, reliable communication, live data access and broad compatibility. Speed matters too. In a busy workshop, slow menus and poor vehicle coverage cost time. For DIY owners, ease of use matters just as much as technical depth.
At Diagnostic Central, that is exactly why the focus stays on practical diagnostic tools that deliver usable results rather than vague promises. The best tool is the one that gives you accurate data quickly and helps you make the next decision with confidence.
How to read OBD2 codes with better accuracy
The best technicians do not just read codes – they build a fault picture. They check the stored codes, look at pending faults, review freeze frame data, compare live values and then test the likely causes in order. That approach works because it avoids guesswork.
If you are newer to diagnostics, keep it simple. Record every code. Note whether it is current, pending or historic. Check whether the code is generic or manufacturer-specific. Read the description carefully, then verify the system with basic inspection and live data before replacing parts.
That discipline is what turns code reading from a gimmick into a proper diagnostic process. The warning light may be the trigger, but the real value is knowing what the vehicle is trying to tell you – and what evidence you still need before picking up the spanners.
A fault code should never be the end of the job. Read it, understand it, test around it, and let the data lead you to the fix.