A vehicle that starts reluctantly in the morning, dims its lights at idle, or throws up a battery warning lamp is often blamed on the battery first. That is exactly why knowing how to test alternator output matters. If the charging system is weak, replacing the battery alone usually wastes time and money, and the fault comes straight back.
For garages, mobile technicians, and capable DIY owners, alternator testing is one of those basic checks that still saves serious diagnostic time. You do not need to overcomplicate it, but you do need to test it properly. A quick voltage glance can point you in the right direction, yet it will not always tell the full story if there is a poor earth, a slipping belt, a smart charging strategy, or a diode problem inside the alternator.
What you need before you test alternator output
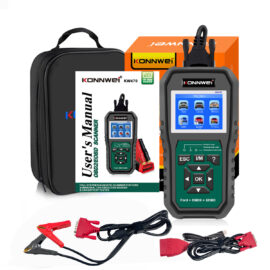
At minimum, you need a decent digital multimeter with reliable DC voltage readings. If you have a battery tester or charging system tester, even better, because it gives you a clearer picture under load. On modern vehicles, an OBD diagnostic tool can also help if the vehicle uses ECU-controlled charging and you want to compare live data with what you are seeing at the battery.
Before testing, make sure the battery terminals are clean and tight. Check the alternator belt condition and tension, and inspect the main charging cable and earth points. An alternator can test badly because of wiring resistance rather than a failed unit, so do not skip the visual checks.
How to test alternator output with a multimeter
The fastest way to begin is at the battery terminals. Set your multimeter to DC volts and place the probes directly on the battery posts, not the cable clamps. This matters because a poor terminal connection can hide the real voltage.
Step 1: Check battery voltage with the engine off
With the engine off and the vehicle rested, a healthy fully charged battery will usually read around 12.6 volts. A reading closer to 12.4 volts suggests it is partially discharged. If you are seeing 12.0 volts or below, the battery is significantly low, and that can affect the rest of your charging test.
This first reading is your baseline. If the battery is deeply discharged, the alternator may charge hard at first, which can make the system look better than it really is. That is why context matters.
Step 2: Check charging voltage at idle
Start the engine and let it settle to idle. Measure voltage again across the battery posts. In many conventional 12V systems, you want to see roughly 13.8 to 14.5 volts. That usually indicates the alternator is charging.
If the reading stays near the engine-off voltage, such as 12.2 to 12.6 volts, the alternator is either not charging properly or the output is not reaching the battery. At that point, you are no longer just checking alternator output. You are checking the charging circuit as a whole.
Step 3: Raise engine speed slightly
Bring the engine speed up to around 1,500 to 2,000 rpm and watch the meter. The voltage should remain stable and typically stay within the same general charging range. A reading that jumps excessively, drops away, or creeps too high can point to regulator trouble.
If voltage rises above about 14.8 volts on a standard system, be cautious. Overcharging can damage the battery and electronic components. If it never rises much above 13 volts, the alternator may be weak, the regulator may be faulty, or there may be excessive voltage drop in the wiring.
Testing alternator output under electrical load
This is where weak alternators often reveal themselves. A vehicle can show acceptable voltage with minimal demand, then fall short once real load is applied.
Switch on major electrical consumers – headlights, heated rear window, cabin blower, and if fitted, heated seats. On some vehicles, air conditioning will add more load as well. Then take the voltage reading again at idle and at around 2,000 rpm.
A healthy charging system should still maintain a sensible charging voltage, typically above 13.5 volts on a conventional setup, though exact figures vary by vehicle. If the voltage drops back towards battery voltage and keeps falling under load, the alternator may not be supplying enough current.
That said, modern smart charge systems can behave differently. Some vehicles deliberately reduce alternator output depending on battery state of charge, temperature, and ECU strategy. If you are working on a newer vehicle and the numbers seem odd but no fault symptoms are present, check whether the system is demand-controlled before condemning the alternator.
When voltage is not enough to confirm the fault
A voltage test is a strong starting point, not the only answer. An alternator can produce correct voltage yet still have problems with ripple, current delivery, or intermittent output.
Check for voltage drop on the positive side
Place the multimeter positive probe on the alternator output terminal and the negative probe on the battery positive post with the engine running and electrical loads switched on. You are measuring voltage drop across the cable. Ideally, it should be very low, often under 0.2 volts.
If the reading is higher, resistance in the cable or connections is restricting charging performance. In that case, replacing the alternator will not fix the actual fault.
Check the earth side as well
Now measure between the alternator casing and the battery negative post under load. Again, the voltage drop should be low. A poor engine earth strap or corroded ground point can reduce charging efficiency and create misleading results.
Watch for AC ripple
If your multimeter has an AC voltage setting sensitive enough for this check, measure across the battery with the engine running. Excessive AC ripple can suggest failed alternator diodes. The exact acceptable value depends on the meter and vehicle, but a noticeably elevated AC reading compared with normal can point to internal alternator issues.
This fault can cause odd electrical behaviour, battery drain, warning lamps, and charging complaints that do not always show up as a simple low-voltage problem.
Common results and what they usually mean
If the engine-off battery voltage is healthy and the running voltage rises properly, the alternator is probably doing its job. If the battery is low and the running voltage remains low as well, suspect charging failure or circuit resistance.
If voltage is too high, the regulator may be failing. If voltage looks acceptable with no load but drops badly once lights and blower are switched on, suspect weak alternator output, belt slip, or poor cable connections. If readings are inconsistent, intermittent wiring faults or internal alternator wear become more likely.
Bear in mind that battery condition matters. A sulphated or internally damaged battery can distort charging behaviour. If the battery cannot accept charge properly, alternator test results may look erratic. In a workshop setting, a battery health test alongside charging checks is the sensible route.
How modern vehicles can mislead you
This is where experience pays off. On older systems, charging voltage was often relatively steady. On many newer vehicles, the ECU can vary alternator output based on driving conditions, fuel-saving strategies, and battery monitoring data. It is not unusual to see charging voltage move around more than expected.
That does not mean the alternator is faulty. It means the vehicle is managing the charge rate actively. If the battery warning lamp is on, stored fault codes are present, or live data shows a mismatch between commanded and actual charging, then you have something to work with. Without that context, a single voltage figure can lead you the wrong way.
This is why a proper diagnostic approach beats guesswork. A multimeter gets you started, but live data, fault code checks, and battery testing make the result far more reliable. That is especially true for stop-start systems and vehicles fitted with battery monitoring sensors.
Safety and testing mistakes to avoid
Do not disconnect the battery while the engine is running to see if the alternator keeps the engine alive. That old shortcut is a bad habit and can damage sensitive vehicle electronics.
Avoid testing on dirty terminal clamps instead of the posts. Do not ignore belt condition. Do not condemn the alternator before checking fuses, wiring, and earths. And if the battery is flat, charge it first where possible before making a final judgement on alternator health.
If you are testing regularly, better equipment makes the job faster and more accurate. A dependable multimeter, battery tester, and diagnostic scanner give you a proper charging-system picture rather than one isolated number. That is the difference between identifying the fault once and chasing the same complaint twice.
When alternator faults are caught early, you usually prevent the bigger headache – roadside breakdowns, repeated battery failure, and electrical complaints that waste workshop hours. Test methodically, trust the readings only when the setup is sound, and let the vehicle tell you the full story.