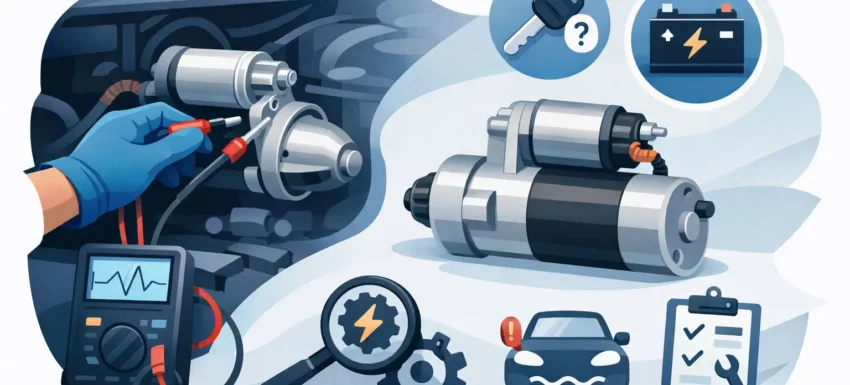
That single click when you turn the key tells you very little on its own. It could be the starter motor, but it could just as easily be low battery voltage, a poor earth, a tired solenoid or excessive resistance in the main cables. If you want to know how to test starter motor faults properly, the job is not guessing and swapping parts. It is a process of proving where the voltage is lost and whether the motor can actually do its job under load.
A lot of starters get condemned too quickly. In workshop conditions, that wastes time and parts. On a driveway, it leads to frustration and the same no-start fault returning because the real cause was elsewhere. The sensible approach is to test the full starting circuit first, then isolate the motor itself.
How to test starter motor faults without guesswork
Before you put a spanner on anything, confirm the symptom. Does the engine fail to crank at all, crank slowly, click once, click repeatedly, or crank normally but not fire? Only the first four point towards the starter circuit. If the engine spins at normal speed, the fault is more likely fuel, ignition, immobiliser or engine management related.
Start with the battery because the starter motor can only work with the current supplied to it. A battery may show 12 volts at rest and still collapse when asked to crank. That is why proper testing matters more than assumptions. Check resting voltage first. Around 12.6V suggests a healthy, charged battery. Much below 12.4V means you should already be cautious.
Now check cranking voltage. Have someone turn the key while you monitor battery voltage with a multimeter. If it drops sharply, often below 9.6V, the battery may be weak or there may be excessive current draw. On modern vehicles, a poor battery can also trigger odd electronic behaviour, so this step matters more than many realise.
If the battery is sound, inspect the basics. Look for loose terminals, corrosion at the posts, damaged positive leads, and poor engine earth straps. A starter draws heavy current. Even slight resistance in the wrong place can stop it dead.
Test the starter circuit before removing the motor
The fastest useful check is to see whether the starter is receiving the correct signals and supply. You need to verify three things: battery feed to the main terminal, trigger voltage to the solenoid when the key is turned, and a good earth return through the engine and chassis.
Check for permanent battery feed
At the large starter terminal, there should be battery voltage present at all times. If there is none, the fault is upstream. That could be a damaged cable, blown fuse link, poor battery connection or, on some vehicles, a high-current distribution issue. If the supply is present, move on.
Check for solenoid trigger voltage
At the smaller trigger wire, you should see voltage when the ignition is turned to crank. If there is no signal, the starter motor may be innocent. The fault could be the ignition switch, starter relay, clutch switch, inhibitor switch, immobiliser or control module logic.
This is where a lot of people go wrong. They hear a no-start complaint and fit a starter without checking whether the starter was ever told to operate. That is not diagnosis. It is guessing.
Check the earth path
The starter grounds through the engine block, so poor engine earth can mimic a failed motor. Put one meter lead on the starter housing or engine block and the other on the battery negative. During cranking, voltage drop should be low. If it rises too far, the earth side has resistance and the motor will struggle even if it is technically serviceable.
Use voltage drop testing, not just continuity
Continuity checks are fine for light circuits. They are not enough for a high-current starter circuit. A cable can show continuity and still fail under load. Voltage drop testing gives you the result that matters in the real world.
To test the positive side, measure between the battery positive terminal and the starter main feed while cranking. A high reading means resistance in the positive cable or its connections. To test the negative side, measure between battery negative and the starter casing or engine block while cranking. Again, too much voltage drop points to resistance in the return path.
As a rule, lower is better. Exact allowances vary by vehicle, cable length and system design, but obvious voltage loss during cranking means the circuit needs attention before you blame the motor. This is especially relevant on older vehicles, commercial applications and anything that has seen corrosion, heat or previous wiring repairs.
How to test starter motor condition directly
Once you know the battery, feed, trigger and earth are correct, you can focus on the starter itself. At that point, a click with no crank, or very slow crank, becomes far more meaningful.
A starter motor has two core jobs. The solenoid must engage the pinion with the flywheel, and the motor must then spin with enough torque to turn the engine. Either part can fail.
If you hear a solid click but the motor does not turn, the solenoid may be operating while the motor is not. That can mean worn brushes, a dead commutator, internal high resistance, a seized motor or severe mechanical drag. If there is no click and the trigger voltage is present, the solenoid itself may have failed.
On some vehicles, gently tapping the starter body while an assistant turns the key can make a worn starter operate one last time. That is not a repair, but it is a useful clue. It often points to worn brushes or internal dead spots.
Bench testing the starter
If access allows and circuit checks are complete, remove the starter and bench test it. Secure it properly first. A starter has serious torque and can jump violently if handled badly.
Apply battery negative to the starter body and battery positive to the main terminal, then energise the solenoid trigger. The pinion should extend cleanly and the motor should spin strongly and smoothly. Slow, noisy or erratic operation means the unit is faulty.
Bench testing is useful, but it has limits. A starter can spin freely off the vehicle and still fail under engine load. A worn unit may look acceptable on the bench but struggle against real compression. That is why in-vehicle voltage and current checks are often more valuable.
Slow cranking does not always mean a bad starter
This is where experience saves time. A slow crank fault can come from thick or contaminated engine oil in cold weather, poor engine earth, battery weakness, internal engine drag or even timing-related engine issues. Diesel engines in winter can exaggerate all of this.
If the starter receives full voltage and still cranks slowly, check current draw if you have the equipment. High current draw with slow turning often points to a failing starter or mechanical drag. Low current draw with slow turning can suggest internal resistance, poor connections or a weak battery. The pattern matters.
For garages and serious DIY users, this is exactly why proper electrical test gear earns its keep. A decent multimeter, battery tester and clamp meter can narrow the fault quickly and stop unnecessary parts replacement.
Common mistakes when testing a starter motor
The most common mistake is replacing the starter before testing battery condition under load. The second is ignoring voltage drop across cables and earths. The third is forgetting the control side altogether – relay, switch, immobiliser and inhibitor faults can all stop a healthy starter from operating.
Another mistake is assuming a new part is automatically good. Replacement starters can be defective out of the box, especially low-grade units. If the fault remains after fitting a starter, do not immediately chase exotic causes. Go back to battery state, cable condition and measured voltage at the motor.
When replacement is the right call
If the starter has correct feed, correct trigger, good earth, acceptable voltage drop and still fails to crank properly, replacement is justified. The same applies if bench testing shows poor engagement, weak spin or obvious internal roughness. At that stage, you have tested the system properly and the decision is evidence-based.
For professional results, pair the replacement with checks on battery health and charging performance. A new starter fitted to a vehicle with a tired battery or high-resistance cables may not last as it should. Starting faults are often shared between components, not isolated to one part.
When you approach the job methodically, how to test starter motor faults becomes straightforward. Prove battery condition, prove supply, prove earth, prove trigger, then assess the motor. That sequence works because it follows the circuit, not the guesswork. If you want fewer comebacks and faster fault finding, test what the starter needs before you condemn what the starter is.