A trailer light fault has a habit of appearing when the job is supposedly finished: the indicators work until the sidelights are switched on, the brake lamps are dim, or nothing works after plugging into a different tow vehicle. Knowing how to test trailer wiring properly lets you isolate whether the fault is in the vehicle socket, the trailer plug, the cable, an earth connection or the lamp unit itself.
For most UK trailers, the fastest route is to test the towing vehicle socket first, then test each circuit through the trailer. Do not assume a recently fitted towbar electrics kit is fault-free, particularly on vehicles with CAN-bus controlled lighting or smart bypass relays.
Quick answer
- Start by checking the trailer plug, vehicle socket and cable for corrosion, water, crushed insulation and loose terminals.
- Test the vehicle socket with a dedicated trailer socket tester or multimeter before connecting the trailer.
- Connect the trailer and operate one lighting function at a time: left indicator, right indicator, tail lamps, brake lamps, fog lamp and reverse lamp where fitted.
- If a lamp is weak, intermittent or activates with another circuit, test the earth path before replacing bulbs or lamp units.
What you need before testing
A dedicated 7-pin or 13-pin trailer socket tester is the quickest tool for a basic towing vehicle check. It shows which outputs are live when each vehicle lighting circuit is selected and removes the trailer from the equation. It is ideal for a fast pre-tow inspection, but it cannot prove that the trailer cable and lamps are sound.
A digital multimeter provides more diagnostic detail. Set it to DC volts to check for a switched supply at the socket, and use continuity or resistance testing only with the trailer disconnected from every power source. A test lamp can also reveal whether a circuit has enough usable current behind it, although an LED test lamp may not load the circuit sufficiently to expose a poor connection.
For repeated workshop work, a trailer break-out adapter is useful because it gives safe access to individual socket terminals without damaging them with meter probes. Use the correct adapter for the socket fitted. Most newer UK tow vehicles use a 13-pin socket, while older trailers and many light trailers still use a 7-pin connection.
Check the obvious faults first
Disconnect the trailer and inspect both halves of the connector in good light. Look for green or white corrosion, blackened terminals, bent pins, a cracked plug body, loose cable grips and water trapped behind the socket flap. A plug that looks acceptable from the outside can still have broken conductors where the cable enters it, especially if the trailer is regularly stored with the cable hanging down.
Check that the socket flap closes firmly. Road spray can quickly contaminate exposed contacts, and a light coating of suitable electrical contact protection after cleaning can help. Do not pack the socket with general-purpose grease, as this can retain dirt and interfere with contact pressure.
Then follow the trailer cable along its full length. Pay particular attention to points near the drawbar, axle, suspension travel and lamp clusters. Chafing against a sharp bracket can short one circuit to another or to the chassis. On plant trailers and commercial applications, look for damage caused by stone impact, loading ramps and repeated flexing.
How to test trailer wiring at the vehicle socket
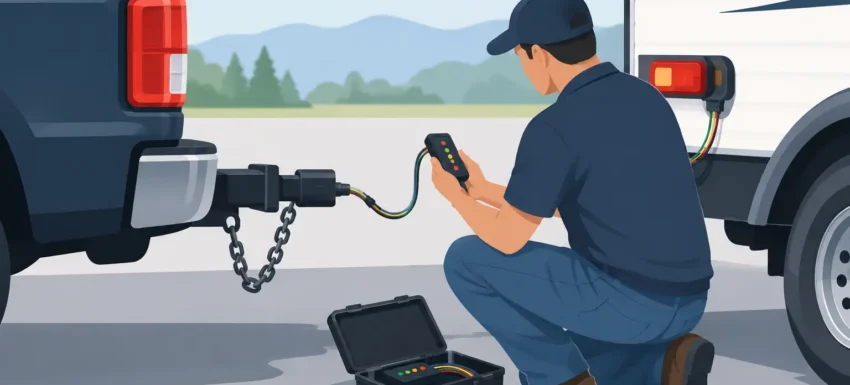
With the trailer unplugged, switch on the vehicle ignition if required by its electrical system. Connect a trailer socket tester, then operate each lighting function separately. On a conventional setup, the relevant indication on the tester should illuminate cleanly and consistently.
Test left and right indicators individually, followed by sidelights, brake lamps, rear fog lamp and reverse lamp where supported. Some vehicles disable certain outputs until they recognise a trailer, while others use bulb-check pulses or pulse-width modulation. A basic tester may flash or give unusual indications on these systems. That does not automatically mean there is a fault.
If using a multimeter, place the black probe on the relevant earth terminal and the red probe on the circuit terminal being tested. You should see a supply close to battery voltage when that function is selected. A reading substantially lower than battery voltage can indicate high resistance in the wiring, a corroded socket terminal, a poor vehicle earth or a problem within the towbar electrical module.
Always identify terminals from the diagram inside the socket cap, the towbar wiring instructions or the vehicle information for the exact setup. Pin allocations differ between 7-pin and 13-pin systems, and additional 13-pin circuits can provide permanent live, ignition-switched live and associated earths. These auxiliary feeds should not be tested casually with a probe or improvised wire, as a short circuit can damage a fuse, relay or control module.
If no circuits work, check the relevant vehicle fuses, towbar control module supply and earth points before condemning the socket. On newer vehicles, a generic wiring connection can trigger bulb warnings or fail to operate correctly, which is why vehicle-specific towing electrics are often the better choice.
Test the trailer circuits one at a time
Once the vehicle socket has passed, plug in the trailer and use an assistant to operate the controls. Work methodically rather than switching everything on at once. Confirm that each lamp is bright, the correct side flashes, brake lights operate evenly and the rear fog lamp works only where applicable.
A useful pattern helps narrow the fault quickly. If one lamp is completely dead but the others work, suspect its bulb, LED module, local connector or the individual wire feeding it. If both tail lamps fail but indicators and brakes work, trace the common tail-lamp circuit. If the entire trailer is dead despite a good vehicle socket, inspect the plug terminations and the main cable close to the plug.
LED lamps complicate matters slightly. They draw very little current, so a poor connection can sometimes show voltage on a meter yet fail when the lamp is connected. Conversely, some older vehicle systems need a compatible bypass relay or coding arrangement to recognise low-current LED trailer lamps. Check the vehicle and towbar electrics requirements before fitting resistors or making modifications.
Diagnose earth faults before replacing parts
A poor earth is one of the most common trailer wiring faults. It often causes lamps to glow dimly, flash with another function or illuminate when the brakes are applied. The current is trying to return through another lamp filament or circuit because its intended earth path has too much resistance.
Start at the trailer plug earth terminal and inspect the earth wire connection. Then inspect earth points at each rear lamp cluster. A ring terminal fixed to painted, rusty or galvanised metal is not a dependable earth connection. Clean the contact area back to sound metal, secure the connection tightly and protect it against corrosion afterwards.
With the trailer disconnected, a continuity test can check the earth wire from the plug to the lamp earth point. A very low resistance is expected. However, continuity alone is not the complete answer: a cable may pass a low-current meter test but fail under lamp load. If in doubt, perform a voltage-drop test with the lamps switched on. Measure between the lamp earth and the battery negative terminal. Any significant voltage indicates resistance in the earth return.
When the fault is intermittent
Intermittent faults need movement. Keep the trailer connected with the relevant lighting circuit switched on, then carefully flex the cable near the plug, drawbar and lamp entries. Watch for flickering. Do not pull on wires or probe terminals while the system is live.
If a fault appears only during towing, check where the cable sits during tight turns and whether it can drag on the road. Also inspect the trailer socket mounting. A loose socket can allow terminal movement and poor contact, especially with a heavy adaptor fitted.
Avoid these common testing mistakes
Do not use a screwdriver, loose wire or paper clip to bridge terminals in a trailer socket. Modern vehicle electrical systems are protected and monitored, but a short can still damage fuses, wiring or a towing module. Use a correctly pinned test tool instead.
Do not assume every 13-pin socket carries charging feeds. Pins for permanent and switched supplies may be unfitted, fuse-protected separately or controlled by the vehicle. Similarly, a trailer board can be wired differently from the colour convention you expect after previous repairs. Verify the terminal connections rather than trusting wire colour alone.
Finally, check the result with the engine running as well as ignition on where practical. A marginal earth or supply connection may behave differently once charging voltage rises and the vehicle’s electrical management changes state.
Frequently asked questions
Can I test trailer wiring without a trailer?
Yes. A dedicated socket tester checks the towing vehicle outputs without connecting a trailer. It is the quickest way to decide whether the fault is vehicle-side or trailer-side, although it does not test cable condition or lamp performance under load.
Why do my trailer lights work until I press the brake?
This commonly points to a poor earth on the trailer. Brake current then returns through another lighting circuit, causing unusual lamp behaviour. Check the plug earth, lamp earth points and any corroded connectors first.
What voltage should a trailer socket show?
On a 12V system, a working lighting output should normally be close to vehicle battery voltage when switched on. Exact readings vary with battery condition, alternator charging and electronic control, so compare suspect circuits with known-good ones.
Can a multimeter damage trailer electrics?
Used correctly, no. Use the voltage range for live checks, make sure probes cannot bridge adjacent terminals, and disconnect power before using continuity or resistance modes. The risk comes from shorting terminals with probes or improvised test leads.
A clean, correctly tested trailer connection is a safety check, not just an MOT consideration. If you need help selecting the right trailer tester, adapter or multimeter for a particular vehicle, contact Diagnostic Central with the registration, VIN and the functions you need to test. That allows the correct socket type and vehicle electrical requirements to be checked before you buy.