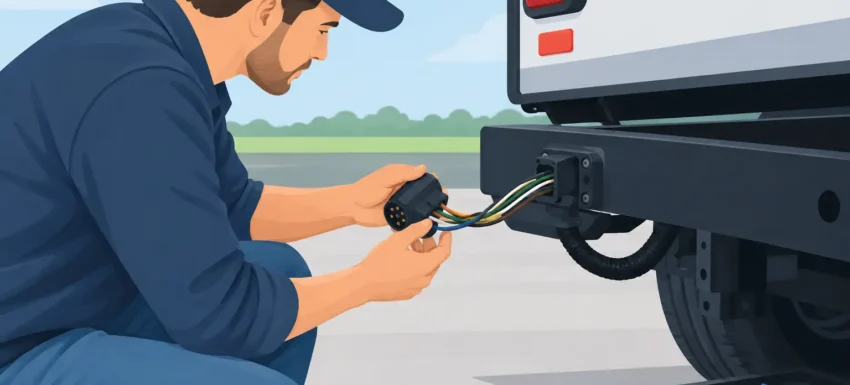
A trailer can look ready for the road and still fail the moment you indicate, brake or switch on the lights. The usual cause is not a major electrical fault – it is a corroded pin, weak earth, split cable or poor repair hidden under tape. Knowing how to inspect trailer wiring properly lets you isolate those faults before they become an MOT issue, a roadside delay or a safety risk for other road users.
For UK trailers, caravans, plant trailers and light commercial applications, the inspection should cover more than whether the lamps illuminate. You need to check the connector, cable condition, earth path, lamp units and circuit operation under load. A test lamp or multimeter turns guesswork into a repeatable diagnosis.
Start with the right test equipment
A basic visual inspection can reveal crushed cable, green corrosion and loose terminals, but it cannot prove that a circuit carries current correctly. At minimum, use a suitable 12V test lamp and a digital multimeter. A test lamp places a real load on the circuit, making it particularly useful for finding high-resistance connections that can appear normal on a meter alone.
For regular workshop work, a trailer socket tester or dedicated 7-pin and 13-pin adapter cable speeds the process considerably. It gives access to individual circuits without forcing probes into terminals or damaging connector seals. For fault-finding on the towing vehicle, use the correct adapter between the vehicle socket and your test equipment rather than relying on improvised wires.
Before testing, make the trailer safe. Chock the wheels, apply the handbrake where fitted, and support the drawbar correctly. Do not work around a trailer with damaged insulation while it is connected to a live battery supply. If you need to repair a wire, disconnect the trailer plug first.
Check the plug and socket before chasing the wiring
The plug is the first place to inspect because it handles water, road salt, repeated movement and poor storage. On a 7-pin plug, remove the cover and look for loose terminal screws, frayed copper strands, moisture and discoloured pins. Blue-green deposits indicate corrosion. Blackened plastic or heat marks suggest resistance and overheating, often caused by a loose terminal or an undersized repair.
Check that the cable clamp grips the outer sheath, not the individual cores. If the cable can pull through the plug body, every movement transfers strain to the terminals. The same principle applies to the towing vehicle socket: inspect its spring-loaded cover, pin tension, seals and mounting. A socket that hangs loose on its bracket can develop intermittent faults that only appear over bumps.
The condition of the pins matters as much as their appearance. Pins should be clean, straight and firm. A heavily worn or loose contact can feed enough voltage for a meter reading but fail when a lamp circuit draws current. Clean light oxidation with electrical contact cleaner and a suitable non-abrasive brush. Do not pack the connector with general-purpose grease, which can trap contamination. Use products intended for electrical connections where protection is required.
How to inspect trailer wiring along the chassis
Follow the full cable route from the plug to each lamp unit. Do not inspect only the section you can see from above. Look underneath the A-frame, along the chassis rails, around axle mounts and at every point where the loom enters a lamp, junction box or conduit.
Pay particular attention to areas where the cable can rub against sharp metal, move with suspension components or become trapped by a loading ramp. A cable may have intact outer insulation but broken conductors inside, especially close to the plug or where it repeatedly flexes. Gently bend suspect sections while operating the relevant light. If the lamp flickers, the wire or terminal is likely failing internally.
Previous repairs deserve close scrutiny. Twisted wires covered in insulating tape are not a durable trailer repair. Water enters, copper oxidises and resistance rises. Use correctly crimped, sealed connectors or proper junction enclosures, with cable sized for the circuit and protected from movement. Keep joins where they can be inspected later rather than burying them inside a chassis rail.
Test the earth circuit first
A poor earth is one of the most common trailer wiring faults. It can produce strange symptoms: indicators glowing faintly through tail lamps, brake lights affecting sidelights, or several lamps failing together. Each lamp needs a sound return path to the earth pin through a dedicated earth wire or a proven chassis connection.
Begin by checking the earth conductor from the plug to the lamp cluster. Look for broken terminals, corrosion at ring connectors and paint or rust beneath chassis earth points. A chassis connection must touch clean bare metal and be protected after fitting. Relying on the tow ball for earth is not acceptable and will produce inconsistent results.
With the trailer connected and a circuit switched on, measure voltage between the lamp’s positive feed and its local earth. You should see close to battery voltage. Then measure between the lamp earth and the towing vehicle battery negative, if access is practical. A meaningful voltage reading on the earth side while the lamp is operating points to voltage drop in the return path.
A test lamp is often faster here. Connect one side to a known good battery positive and probe the trailer earth at the plug, junction points and lamp connectors. A bright, steady lamp indicates a usable earth. A dim lamp or no illumination tells you where to focus. The exact method depends on access and connector design, but the principle is constant: test the earth under load, not just for continuity.
Verify every lighting function under load
Once the physical inspection and earth check are complete, test each circuit individually. Ask another person to operate the vehicle controls, or use a suitable trailer light tester. Check left and right indicators, hazard warning lights, sidelights, brake lights, rear fog lamp and reversing lamp where fitted. On a 13-pin system, auxiliary feeds may also be present for caravan functions.
Watch for more than complete failure. A noticeably dim lamp, a fast indicator flash rate, cross-feeding between functions or a fault that appears only with headlights on all point to resistance, an earth issue or incorrect wiring. Compare both sides of the trailer. Matching lamp units should be similar in brightness and response.
LED lamps require a little extra judgement. Their low current draw means a poor connection may still operate an LED while failing a conventional filament lamp. Conversely, some towing vehicles monitor bulb load and may display a warning or flash rapidly when LEDs are fitted without compatible wiring or load management. Do not assume the trailer is faulty until you have confirmed the vehicle’s trailer detection system and the lamp specification are compatible.
Use voltage-drop tests for intermittent faults
Continuity testing has a place, but it can mislead. A wire with only a few remaining strands may show continuity with no load applied, then fail when the circuit is used. Voltage-drop testing exposes this problem.
With the relevant lamp switched on, place the meter across a connection or length of cable: one probe on the supply side and one on the load side. A healthy connection should show very little voltage drop. If you find a substantial reading across a plug pin, crimp, earth point or cable section, that component is restricting current and needs repair.
Work methodically from the towing vehicle socket towards the lamp. Confirm the vehicle output first, then check the trailer plug, the first junction, the lamp feed and finally the earth. This prevents replacing lamps or rewiring a trailer when the fault is actually in the vehicle socket.
Repair for reliability, not a temporary pass
After identifying the fault, replace damaged cable rather than patching multiple weak sections. Route the new loom in protective conduit where exposure is high, allow enough slack at articulation points, and secure it with suitable clips. Avoid cable ties pulled tight against sharp edges, as vibration will eventually cut through the insulation.
If a lamp unit has water inside, inspect the seal and cable entry before replacing the bulb. Water damage can corrode bulb holders and terminals beyond recovery. On older trailers, replacing a compromised lamp cluster may be more reliable than repeatedly cleaning contacts.
Finish by repeating the complete function test with the cable positioned normally and the plug cover closed. Then move the lead at the plug and where it enters each lamp. A circuit that survives this final movement check is far less likely to let you down on the road.
A clean, correctly supported trailer loom is not cosmetic workshop work. It is evidence that every signal behind the trailer is being delivered clearly. Build the inspection into your pre-tow routine, keep proper test equipment to hand, and small electrical faults stay small.