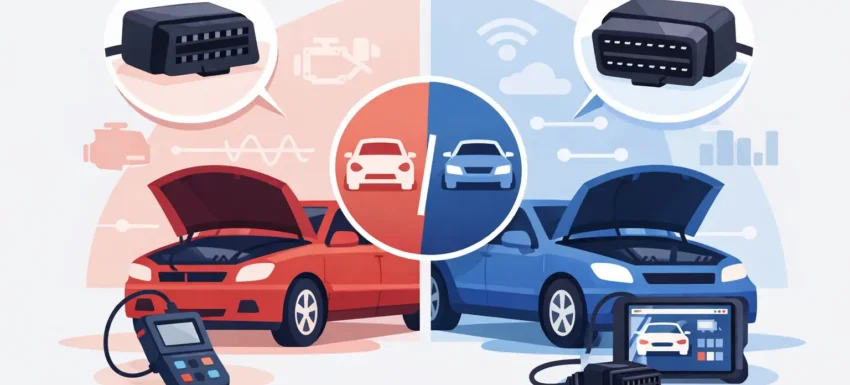
A warning light is only the start of the job. The real question is whether your diagnostic equipment can communicate with the vehicle, retrieve meaningful information and help prove the fault before parts are fitted. That is where OBD1 vs OBD2 diagnostics matters. The two systems differ sharply in connector design, communication protocols, code access and the level of information available to the technician.
For a modern garage, OBD2 coverage is essential. For anyone working on older vehicles, however, understanding OBD1 prevents a common and costly mistake: assuming a 16-pin scanner will work simply because a car has an engine management system.
OBD1 vs OBD2 diagnostics: the core difference
OBD stands for On-Board Diagnostics. OBD1 describes the early generation of vehicle self-diagnosis fitted before a common standard existed. Each manufacturer developed its own connectors, code formats, communication methods and test procedures. A Ford, Vauxhall, BMW or Toyota from the OBD1 era may all require different leads, software or manual methods to access faults.
OBD2 is the later standardised system. In Europe it is commonly referred to as EOBD, although the terms are often used interchangeably when discussing scan tools. It introduced a standard 16-pin diagnostic socket, standardised emissions-related fault codes and defined communication protocols. This made it far easier for independent garages and vehicle owners to use one tool across many makes.
The practical difference is straightforward. OBD1 usually requires make-specific knowledge and equipment. OBD2 gives a scanner a far better chance of connecting, reading generic powertrain codes and displaying live data without needing a different adaptor for every vehicle.
That does not mean OBD2 makes every vehicle identical. Manufacturer-level systems for ABS, airbag, service functions, electronic parking brakes, coding and module programming still vary widely. A basic reader may identify an engine fault on a modern vehicle, while a professional multi-system scanner is needed to diagnose the full vehicle properly.
When did OBD2 become standard in the UK?
For European-market passenger vehicles, EOBD requirements were introduced in stages. Petrol cars generally adopted EOBD from 2001, with diesel passenger vehicles following from 2004. There are exceptions around registration dates, vehicle weight, market specification and early implementation, so the socket and actual protocol should always be checked rather than assumed.
Most OBD2-equipped cars have the familiar 16-pin socket, often located beneath the dashboard on the driver’s side, near the centre console or behind a trim panel. Finding that socket is useful, but it does not confirm that every system is accessible through a generic scanner.
Older OBD1 vehicles can have a rectangular, round or manufacturer-specific diagnostic connector. Some have more than one connector. Others require a manual flash-code procedure using an LED, test lamp or dashboard warning light. This is why an adaptor kit and reliable vehicle coverage information are valuable for workshops servicing older cars, vans and imported vehicles.
What information can each system provide?
OBD1 systems were designed primarily to help manufacturers and trained technicians identify basic engine-management failures. Depending on the vehicle, you may be able to retrieve stored codes for sensors, injectors, ignition circuits, airflow metering or throttle position. The data is often limited, and the code definitions are manufacturer-specific.
In many cases, an OBD1 code points to a circuit or operating area rather than a failed component. A code relating to an oxygen sensor, for example, may be caused by wiring damage, a poor earth, an exhaust leak, an air leak or a fuelling issue. Replacing the named part without testing the circuit is no more accurate than guessing.
OBD2 diagnostics generally offer much more. A capable scanner can read and erase fault codes, show freeze-frame information captured when a fault occurred, monitor readiness status and display live data. Live data may include engine speed, coolant temperature, fuel trims, intake air temperature, manifold pressure, oxygen-sensor activity and calculated load.
These readings allow a technician to test the story behind the code. If the vehicle reports a lean-condition fault, short-term and long-term fuel trims can help establish whether the engine is genuinely running lean, whether the fault is intermittent, or whether the sensor data is implausible. That is the difference between code reading and proper fault diagnosis.
Generic codes versus manufacturer codes
OBD2 introduced generic diagnostic trouble codes, commonly called DTCs. A code beginning with P0 is generally a standard powertrain code that a universal scanner should interpret. Codes beginning with P1 are commonly manufacturer-specific, and the meaning can differ between makes.
The same principle applies beyond engine management. A budget code reader may access generic P-codes only. A higher-level diagnostic machine can often retrieve B-codes for body systems, C-codes for chassis systems and U-codes for network communication faults, subject to vehicle coverage.
For routine warning-light checks, generic code access can be enough. For workshop work involving ABS faults, airbag warnings, DPF data, injector coding, service resets or electronic parking-brake maintenance, make and model coverage matters far more than the presence of an OBD2 plug.
The diagnostic equipment each system needs
An OBD1 vehicle is not necessarily difficult to diagnose, but it requires the correct approach. A workshop may need brand-specific cables, a suitable diagnostic interface, workshop information and, on some older models, a breakout lead or multimeter for circuit testing. The ability to read flash codes is useful, but it should not replace voltage-drop tests, continuity checks and sensor signal testing.
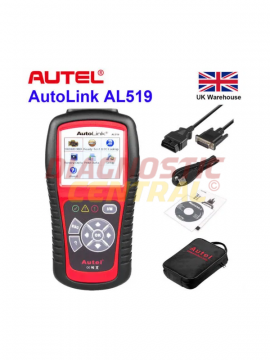
For OBD2 vehicles, a simple handheld reader is often suitable for checking an engine warning light, clearing a confirmed repair and monitoring basic live data. It is a sensible option for competent DIY users who want clarity before booking repairs.
Professional users should look beyond generic compatibility. Daily workshop equipment needs dependable software coverage, fast communication, live data graphing, actuator tests where supported and access to multiple control units. It should also cope with the mix of cars, vans and light commercial vehicles that actually enter the workshop.
Diagnostic Central supplies equipment and adaptor options for this real-world spread of vehicles. The right kit is not always the most expensive unit. It is the one that supports the systems, makes and model years you service, with the cables required to connect without improvisation.
Why a 16-pin socket is not the whole answer
A frequent misconception is that every 16-pin diagnostic socket gives complete access to the vehicle. It does not. OBD2 standardisation focused heavily on emissions-related engine diagnostics. Manufacturers still control how much access third-party tools receive to other modules, and newer vehicles can include security gateways that restrict certain functions.
Communication protocol also matters. OBD2 vehicles can use ISO, KWP2000, J1850 or CAN-based communication. Most quality modern scanners detect the protocol automatically, but older equipment may not support every type. CAN is particularly common on later vehicles and is central to communication between modern control modules.
The connector may also be physically present while the vehicle has limited OBD functionality, especially on transitional models or non-standard imports. Before promising a customer a diagnosis, verify the vehicle identification number, model year, engine type and the tool’s stated coverage.
A better fault-finding process for either system
Whether the vehicle uses OBD1 or OBD2, the process should remain disciplined. Start by confirming the complaint and checking battery condition, fuses, connectors and obvious wiring damage. Low system voltage can create misleading faults across multiple modules, particularly on modern vehicles with sensitive control units.
Read all available codes before clearing anything. Record code numbers, status and freeze-frame data where available. Then use live readings, wiring diagrams and component tests to establish cause and effect. Clear codes only after repairs or when a controlled recheck is needed.
A stored code is evidence, not a repair instruction. This is particularly relevant to intermittent faults, network communication codes and emissions faults. A road test, a battery test or a targeted electrical measurement may provide the proof that the scanner alone cannot.
Choosing between an OBD1 and OBD2 solution
If you mainly work on vehicles from the early 2000s onwards, OBD2 capability should be the starting point. Choose a tool according to the depth of functions required, not just the number of vehicle makes shown on the box. A reliable scanner with accurate live data and relevant service functions will save more time than a long list of unsupported menu options.
If older vehicles are part of your workload, check OBD1 support before buying. You may need a dedicated make-specific tool, a multi-brand adaptor kit or both. This is especially relevant for specialists, restoration workshops and technicians dealing with older Japanese or European imports.
The best diagnostic setup is one that removes uncertainty at the vehicle. Match the tool to the car, confirm the fault with measured evidence and let the data guide the repair. That approach protects workshop time, prevents unnecessary parts replacement and gives customers a diagnosis they can trust.